

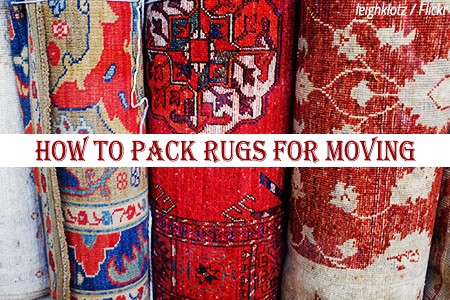
How to pack area rugs for moving
Packing rugs for moving doesn’t seem too complicated – you just roll up your area rug and you’re done, right? Well, not quite.
It’s the little things that make a world of difference in the end. Think about this: the tasks of packing books, clothes and shoes for moving also seem like no-brainers until you skip a packing step or mess up the packing technique altogether to end up with damaged books, crushed shoes and ruined pieces of clothing.
In this article, we’re going to show you how to pack a rug for moving – small regular area rugs that are fairly inexpensively and large rugs such as Persian rugs that are both very expensive and very valuable.
Follow the packing steps below to learn the best way to pack rugs for a move.
How to pack rugs when moving (small regular area rugs)
Needless to say, low-cost smaller area rugs are easier to pack and move than large area rugs that are both super expensive and super large, to begin with.
Luckily, you’ll only need three things to pack a rug for a move: 1) large pieces of durable brown or Kraft paper, 2) two pieces of string, twine or rope per rug, and 3) packing tape.
Step 1. Clean the rug. Vacuum the rug to remove any dust or even tiny bits of food or other matter that may be hiding in the fibers of the carpet. This step is important as you don’t want any pests to get interested in your rugs. For best result, leave the rug out in the sun for a few hours before packing. If you have an area rug that is really dirty and soiled up from years of service, consider having it cleaned professionally prior to packing.
Step 2. Determine the direction of the nap. The fibers of an area rug have a specific direction. This is step is all about figuring the direction of the rug pile (nap). To do this, rub your palm over the surface of the rug. You’ll notice right away that the fibers will give you some sort of resistance in one direction while they will feel smooth as you’re gliding your hand over it in the other direction.
Step 3. Turn the rug upside down. That’s right, before you can roll a rug for shipping, you have to turn the carpet upside down so that the rug pile faces the floor. This is crucial. Why? If you roll your rug with the pile facing you, then you will put extra pressure to the backing of the rug, and as most fairly inexpensive rugs are stiff-backed, that may lead to stretching and possible cracking.
Step 4. Roll it up. Start rolling your small area rug against the direction of the grain (rug pile or nap). Roll the rug slowly to create a tight cylinder and remember that a good fold will mean easier and safer handling and moving of your area rug.
Step 5. Tie it up. When you’re done rolling up the rug into a neat and tight cylinder-shaped bundle, use two pieces of string or twine, one at each end, to secure the rolled-up rug and keep it from unfolding during transport. Do not use packing tape directly over your rug for fear of damaging it.
Step 6. Wrap it up. DO NOT wrap your area rug in plastic. This common mistake when packing area rugs can cost you dearly. The problem is that while plastic wrap will keep the carpet perfectly safe from external harmful influences during the move (dirt, dust, rain, etc.), the plastic protective material prevents the rug from breathing and will trap moisture in, thus causing mold and mildew to grow. Instead, roll your rolled-up area rug in a couple of sheets of hard brown or Kraft paper, then tape it up, and you’re done.
How to protect floors when moving
How to pack oriental rugs (expensive hand-made Persian rugs)
Now, let’s take a look at how to fold an oriental rug – the oversized hand-made rug that usually costs a fortune. However, as an owner of such a priceless carpet, you know that it has no equivalent when it comes to quality, craftsmanship, and beauty.
Follow the steps below to learn how to pack Persian rugs – a big 10’x13’ hand-made Persian rug in our example.
Step 1. Vacuum the rug. Make sure your large rug is clean before you wrap it up for transport. Consider professional carpet cleaning, if necessary.
Step 2. Turn the rug over. Again, you will need to turn your big rug upside down so that the rug pile faces the floor. In this case, you may need another person to help you out due to the enormous size of the rug. You could do it alone but it’s always easier when you have a helper. This step is very important, don’t just skip it for whatever reason.
Step 3. Fold the rug into thirds. Roll the rug in a lengthwise fashion into thirds – just grab one corner of the carpet and fold it toward the center, roughly to the middle longitudinal line of your large area rug. Then, take the other end and draw it over the already folded section, so that in the end your rug is folded in thirds and you get 3 layers of carpet one on top of the other. You don’t have to be too exact with that initial fold, so no measuring tape is necessary for this step.
Step 4. Determine the direction of the grain. As explained above, you’ll need to know the direction of the rug pile to be able to pack your rug properly. Do this by rubbing your hand over the surface and then figure out which motion gives you resistance and which motion feels smooth. Remember: you want to roll your large area rug against the rug fibers (nap).
Step 5. Fold the rug. Walk on the rug to the proper end of the folded rug, take that end in hands and, as you start walking backward, fold the rug over itself, against the grain. Stop before you reach the opposite end, leaving roughly 3 feet.
Step 6. Roll the rug. Go back to the folded against-the-nap end and start rolling the rug in a tight bundle. It usually takes 2 or 3 folding motions to reach the 3-foot section that you haven’t yet folded.
Step 7. Finish the rug roll. Take that remaining rug area, then fold it once back until it touches the already folded section. Finally, fold the two section one over the other to get a single neat and tight rug bundle. The secret to this rug folding technique is that it does not place any pressure on its foundation – instead, by turning the area rug upside down in Step 2, this folding method uses the built-in inclination of the carpet to roll naturally, thus eliminating any chance of damage due to improper folding and packing.
Step 8. Tie up the rug. Use two pieces of string, twine or rope to tie the rub bundle near its ends. Nothing complicated here, just don’t overdo it – tightening the twine or rope too much will put extra pressure onto the surface of the area rug and might damage it. The main purpose here is to secure the bundle so that it won’t get unfolded during transit.
Step 9. Wrap the rug. Again, do not use plastic to wrap the folded and secured rug bundle. (Refer to Step 6 in the previous section to understand why). Instead, use durable brown paper (Kraft paper) to wrap entirely the rolled carpet bundle, then tape it up with packing tape to secure the packing paper.
Step 10. Congratulate yourself. You’ve made it! After you’re done, the huge 10’x13’ handmade Persian rug should be transferred into a tight package measuring around 3’5’’ in length and roughly 2 feet in width. This way, your large rug will be relatively easy to move to your new home, and more importantly – it will stay safe during the haul too.